Monday 29 December 2014

Internationalization Automation Testing using WebDriver & Java

Internationalization, a subset of Globalization also known as i18n.

With the increasing competition in software industry, Organizations are targeting global markets to spread the business and influence of the product. This means working beyond the geography, culture, language and to work with clients to make sure that application/software has proper handling in terms of readable, view-able, writable and functional perspectives. So, the question here is – Do we need to develop separate application / software for each language and country? The answer is NO.

In internationalization development team removes the hard coded strings and put them into the resource file, there will be different resource files for all different languages. And, by replacing the default language resource file with target language resource file will activate that locale on the application. This is the most used option in development for internationalization development.

The purpose of telling the process of development here was to make you all aware that we can follow the same strategy in automation testing of i18n applications. Developers use these resource files for different language provided by linguist experts in a key-value format. Here key for all locale are same with different value based on language.

Let’s understand the approach in little bit detail. As all of you would be aware of that computer program or code only understand the Latin-1 or Unicode characters. So, all the extracted values from resource files should be translated. Characters of different languages are categorized in single-byte and double-byte characters set. Languages like French, German contains single-byte characters and need not to translate, but languages like Chinese, Korean and Japanese contains double-byte characters. So, to use them in program or code we need to convert into Unicode.

To convert double-byte characters into Unicode, JDK provides a utility called native2ascii. In this post we will use the same for conversion.

Practical Implementation:

Double-byte characters to Unicode conversion:
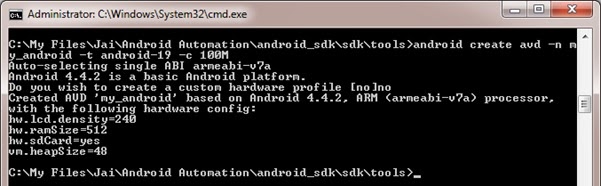
Below command can used on CMD for conversion. JDK must be installed into the system.

native2ascii -encoding utf8 japanese_native.txt japanese_ascii.txt

Now, we will do this stuff programmatically using Java.


import java.io.File;

public class RunCommandLine {

    public static void runNative2Ascii(String languageFile, String outputFile){
 Runtime runtime = Runtime.getRuntime();
 Process process;

 try{
     System.out.println("native2ascii -encoding utf8 \"" 
    + new File(languageFile) + "\" \"" + new File(outputFile) + "\"");
    process = runtime.exec("cmd /c native2ascii -encoding utf8 \""
    + new File(languageFile) + "\" \"" + new File(outputFile) + "\"");
 }catch(Exception ex){
           ex.printStackTrace();
 }
   }
}

Sample Japanese native language file and output file after Unicode conversion:


The Java class RunCommandLine.java run the native2ascii command programmatically and Unicode characters of Japanese native language will be saved into output.txt file. To read those Unicode characters find below the code:


import java.io.BufferedReader;
import java.io.File;
import java.io.FileInputStream;
import java.io.InputStream;
import java.io.InputStreamReader;
import java.util.regex.Matcher;
import java.util.regex.Pattern;

public class ReadTextFile {

 public static String readParsedResourceFile(String fileName){
  InputStream iStream = null;
  InputStreamReader iStreamReader = null;
  BufferedReader bReader = null;
  StringBuffer sBuffer = new StringBuffer();
  String content = null;
  String resultString = "";

  try{
   iStream = new FileInputStream(new File(fileName));
   iStreamReader = new InputStreamReader(iStream);
   bReader = new BufferedReader(iStreamReader);

   while((content = bReader.readLine()) != null){
    sBuffer.append(content);
   }
   content = sBuffer.toString();
   content = content.substring(6, content.length());
  }catch(Exception ex){
   ex.printStackTrace();
  }finally{
   try{
    if(iStream != null) iStream.close();
    if(iStreamReader != null) iStreamReader.close();
    if(bReader != null) bReader.close();
   }catch(Exception ex){
    ex.printStackTrace();
   }

  }
  Matcher m = Pattern.compile("\\\\u([0-9A-Fa-f]{4})").matcher(content);

  while (m.find()) {
   try {    
    int cp = Integer.parseInt(m.group(1), 16);
    char[] chars = Character.toChars(cp);
    String rep = new String(chars);    
    resultString += rep; 
   } catch (NumberFormatException e) {
    e.printStackTrace();
   }
  }
  return resultString;
 }
}


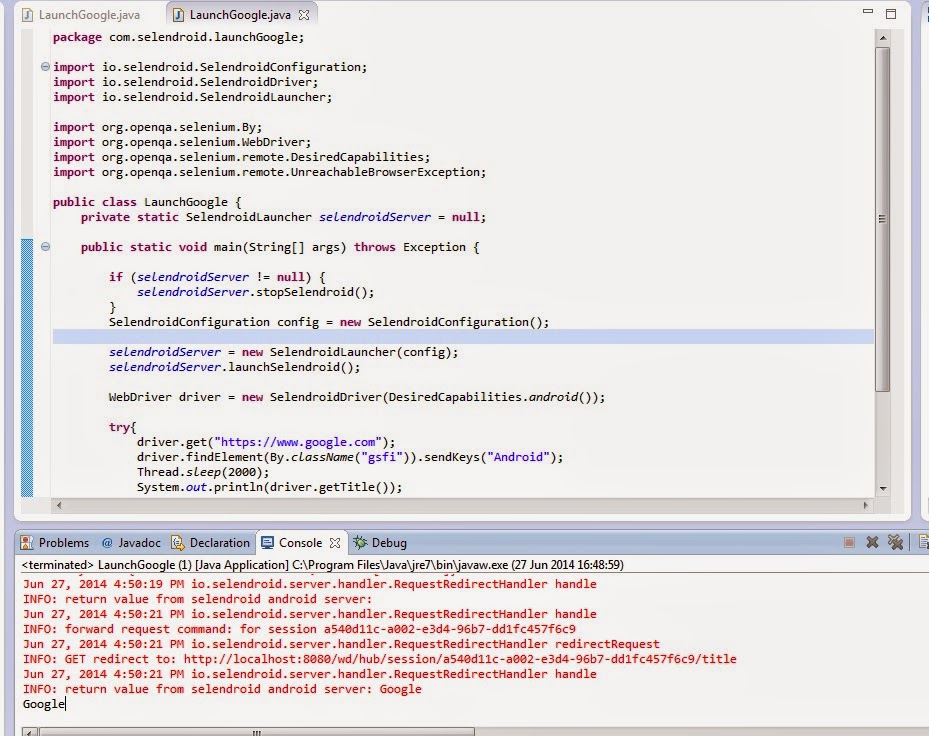
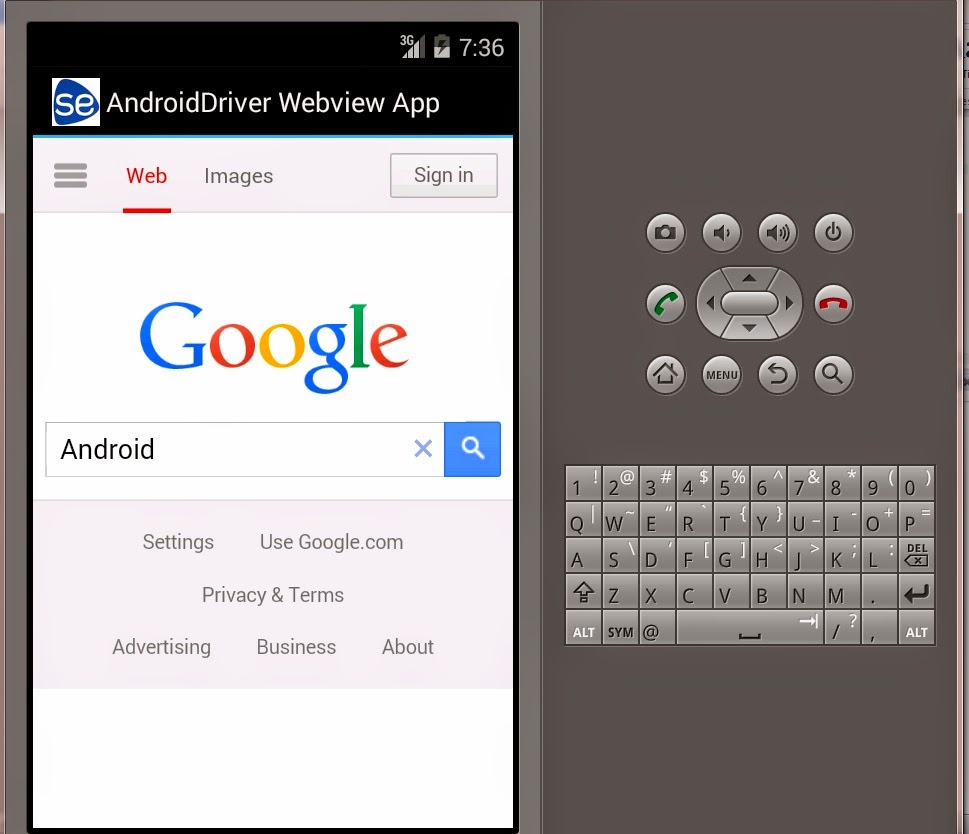
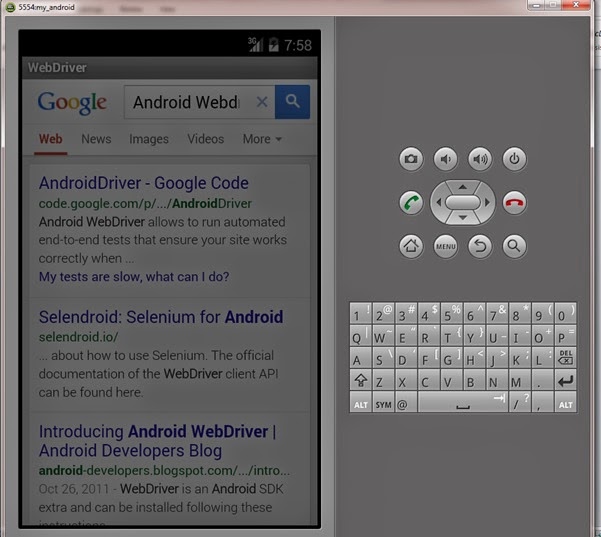
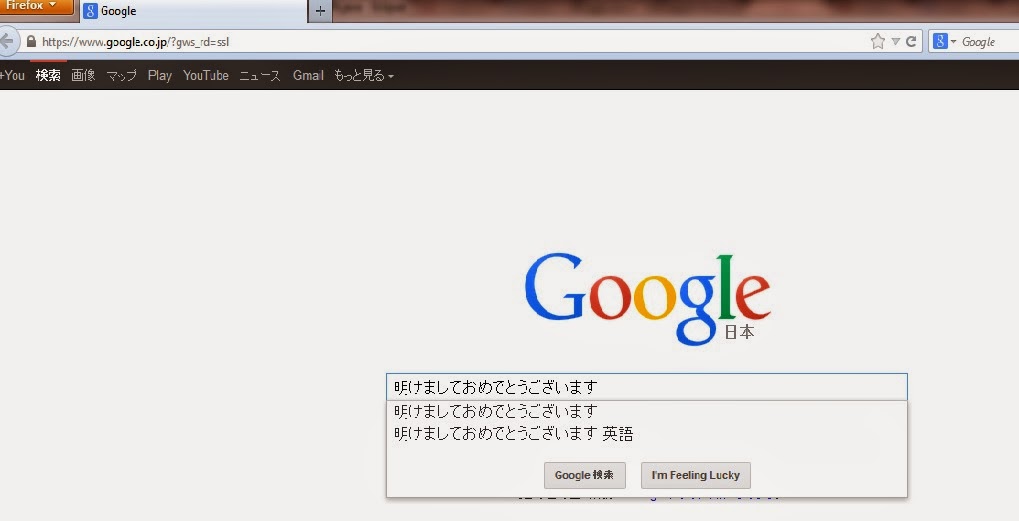
Now, we will write the script to see the actual result. In the following we are launching google in Japanese domain and typing Japanese text to the browser which is actually Unicode characters saved in output.txt file. Find below code for the same:

import java.util.concurrent.TimeUnit;
import org.openqa.selenium.By;
import org.openqa.selenium.WebDriver;
import org.testng.annotations.BeforeTest;
import org.testng.annotations.Test;

import com.blogger.util.ReadTextFile;
import com.blogger.util.RunCommandLine;

public class GoogleI18N {
 WebDriver driver;
 
 @BeforeTest
 public void setup(){  
  driver.manage().window().maximize();
 }
  
 @Test(priority=0)
 public void launchURL(){
  driver.get("http://www.google.jp");
 }
 
 @Test(priority=1)
 public void searchInDetuchLanguage(){
     driver.manage().timeouts().implicitlyWait(10, TimeUnit.SECONDS);
     RunCommandLine.runNative2Ascii(""
  + ".\\resources\\japanese.txt", ".\\resources\\output.txt");
     driver.findElement(By.xpath("//div[@id='sb_ifc0']//input"))
     .sendKeys(ReadTextFile.readParsedResourceFile(".\\resources\\output.txt"));
 }
}


Output:


Hope this article gives you a rough idea on how to proceed with internationalization testing.

Stay tuned to see more updates.

Please like and comment if you like the post.

Saturday 15 November 2014

Taking Screenshot using Selenium Webdriver

Selenium Webdriver provides functionality to capture screenshot at run time. It can be very useful if it is implemented in a right ways in your framework. Suppose we have to capture screenshot at run time whenever any validation is failed. It will also help non technical person to understand the reason behind of the failure and will help tester/developer to debug in less time.

In the below example code we are providing wrong value of Sign In button to fail the test, and based on the Boolean result driver is capturing the screenshot.

Find the sample code below for the same:


import java.net.MalformedURLException;
import java.io.File;
import java.io.IOException;
import java.util.UUID;

import org.apache.commons.io.FileUtils;
import org.openqa.selenium.By;
import org.openqa.selenium.OutputType;
import org.openqa.selenium.TakesScreenshot;
import org.openqa.selenium.WebDriver;
import org.openqa.selenium.firefox.FirefoxDriver;
import org.testng.annotations.AfterClass;
import org.testng.annotations.AfterMethod;
import org.testng.annotations.BeforeClass;
import org.testng.annotations.Test;

public class CaptureScreenshot {
 
public WebDriver driver;
boolean flag1;

 @BeforeClass
 public void setup(){
  driver = new FirefoxDriver();
  driver.get("http:\\www.gmail.com");
 }
 
 @Test
 public void testOne(){
         flag1 = driver.findElement(By.id("signIn")).getAttribute("value").
                 equalsIgnoreCase("Sign");
 }
 
 @AfterMethod
 public void afterFailure(){
  try {
   captureScreen(uniqueFileName(), flag1);
  } catch (IOException e) {
   e.printStackTrace();
  }
 }
 
 public void captureScreen(String fileName, boolean flag) throws IOException{
  if(flag == false){
   File scrFile = ((TakesScreenshot) driver).getScreenshotAs(
                  OutputType.FILE);
   FileUtils.copyFile(scrFile, new File(fileName),true);
  }else{
   System.out.println("Validation Passed");
  }
  
 }
 
 public String uniqueFileName(){
  String imageName = "C:\\SeleniumImage\\Image" + UUID.randomUUID().
                      toString().replaceAll("-", "") + ".png";
  System.out.println(imageName);
  return imageName;
 }
 
 @AfterClass
 public void tearDown(){
  driver.quit();
 }
}

Stay tuned to see more updates.

Facebook Page: https://www.facebook.com/crazzzygig

Wednesday 22 October 2014

Selenium Grid Practical Example With Different Browsers


In the previous post we have seen how to configure Selenium Grid and distribute tests to execute on nodes (Either virtual or physical machines). In this post we will learn how to distribute tests on different machines with different browsers.

Configure Hub: It will be same as we have done in previous post.

Configure Nodes: To configure nodes we will follow the same command we have used in previous post but with some extra options.

Now we have condition to setup our environment for different browsers on different machines.

For Firefox: As we know the driver for Firefox browser is already provided by Selenium Webdriver API, so we do not need any driver to initialize the Firefox browser. We will run the command written below to start node for Firefox:

java -jar selenium-server-standalone.jar -role node -hub http://localhost:4444/grid/register -port 5656

For Chrome: Driver to initialize Chrome browser is not provided by Selenium Webdriver API, so start the node for Chrome browser we need to download the Chrome Driver. You can easily find the binary for Chrome driver on web or you can follow the link:

http://docs.seleniumhq.org/download/

You will download the chromedriver binary with respect to the Operating System:


After downloading the Chrome driver we need to create an instance of Webdriver for Chrome browser, we will run the following command:

Java -Dwebdriver.chrome.driver= “C:\My Files\Selenium Browser Drivers\chromedriver.exe” -jar selenium-server-standalone.jar -role node -hub http://192.201.16.21:4444/grid/register -port 5757

For Internet Explorer: Driver to initialize IE browser is also not provided with Selenium Webdriver API, so to start the node for IE browser we need to download the ID Driver. You can easily find the binary for IE driver on web or you can follow the link:


You will download the iedriver binary with respect to the 32 or 64 bit Windows Operating System.

After downloading the ie driver we need to create an instance of Webdriver for internet explorer browser, we will run the following command:

Java –Dwebdriver.ie.driver= “C:\My Files\Selenium Browser Drivers\IEDriverServer.exe” –jar selenium-server-standalone.jar -role node -hub http://192.201.16.21:4444/grid/register -port 5858

Once we are done with the registration of nodes for Firefox, Chrome and Internet Explorer, we will create a Maven project (I am using Maven to make my life easier, you can create project by another method as well).

In below screen shot you can see that I have created a Maven project and added a TestNG.xml to manage Test Suites and Test Cases.


Write the test script, find the sample code below:


import java.net.MalformedURLException;
import java.net.URL;
import java.util.concurrent.TimeUnit;

import org.openqa.selenium.By;
import org.openqa.selenium.Keys;
import org.openqa.selenium.Platform;
import org.openqa.selenium.WebDriver;
import org.openqa.selenium.interactions.Actions;
import org.openqa.selenium.remote.DesiredCapabilities;
import org.openqa.selenium.remote.RemoteWebDriver;
import org.testng.annotations.AfterTest;
import org.testng.annotations.BeforeTest;
import org.testng.annotations.Parameters;
import org.testng.annotations.Test;

public class DistributeTests {

 WebDriver driver;

 @Parameters("browser")
 @BeforeTest
 public void launchBrowser(String browser)
 {  
  String URL = "http://www.google.com";
  if (browser.equalsIgnoreCase("firefox"))
  {
   System.out.println("Initializing FireFox");
   String Node = "http://10.205.112.18:5656/wd/hub";
   DesiredCapabilities cap = DesiredCapabilities.firefox();
   cap.setBrowserName("firefox");
   cap.setPlatform(Platform.WINDOWS);
   try {
    driver = new RemoteWebDriver(new URL(Node), cap);
   } catch (MalformedURLException e) {
    System.out.println("Requested Browser is undefined");
   }
   driver.manage().timeouts().implicitlyWait(10, TimeUnit.SECONDS);

   driver.get(URL); 
  } 
  else if (browser.equalsIgnoreCase("chrome")) 
  {
   System.out.println("Initializing CHROME");
   DesiredCapabilities cap = DesiredCapabilities.chrome();
   cap.setBrowserName("chrome");
   cap.setPlatform(Platform.WINDOWS);
   String Node = "http://10.205.112.19:5757/wd/hub";
   try {
    driver = new RemoteWebDriver(new URL(Node), cap);
   } catch (MalformedURLException e) {
    System.out.println("Requested Browser is undefined");
   }
   driver.manage().timeouts().implicitlyWait(10, TimeUnit.SECONDS);

   driver.get(URL); 
  } 
  else if (browser.equalsIgnoreCase("ie")) 
  {
   System.out.println("Initializing IE");
   DesiredCapabilities cap = DesiredCapabilities.internetExplorer();
   cap.setBrowserName("ie");
   cap.setPlatform(Platform.WINDOWS);
   String Node = "http://10.205.112.19:5757/wd/hub";
   try {
    driver = new RemoteWebDriver(new URL(Node), cap);
   } catch (MalformedURLException e) {
    System.out.println("Requested Browser is undefined");
   }
   driver.manage().timeouts().implicitlyWait(10, TimeUnit.SECONDS);

   driver.get(URL);
  }

 }

 @Test
 public void runTests(){
  driver.findElement(By.id("gbqfq")).sendKeys("Selenium Grid");
  (new Actions(driver)).sendKeys(Keys.ENTER);
 }

 @AfterTest
 public void tearDown(){
  driver.quit();
 }
}


Now it’s time to manage all test configurations from created TestNG.xml. We have a situation to execute test in parallel on Firefox, Chrome and IE browsers and for that we will have to set the attribute ‘parallel=”tests”;’


Finally it’s time to execute the tests. Run the test as TestNG Test.


Stay tuned to see more updates.

Facebook Page: https://www.facebook.com/crazzzygig

Monday 20 October 2014

Reducing Test Automation cost while maintaining the efficiency

With the increasing competition in software development industry, Organizations are looking for the proof solutions to keep up themselves parallel or ahead of their competitors. So to be in the competition companies need to be equipped with latest technologies and other resources and it will cost a lot of investment in terms of money, setup etc.

After all these challenges many Researchers and Engineers are continuously working to develop such things that can reduce cost & risk and maximize the efficiency. From the past few years the concept of virtualization and cloud-based infrastructure has played a major role to cope up with these challenges.

Nowadays, Organizations are adopting virtualization and cloud-based infrastructure to reduce the cost and scale up the efficiency. Now coming to the point, Virtualization and cloud-based infrastructure can scale the test automation by reducing the physical hardware required to setup a test environment. With the amalgamation of these technologies we can test web application on a variety of browser, device and operating system combinations.

Selenium Webdriver has unrivalled support for testing web application in virtual environment, executing test in parallel, maximizing speed, coverage and minimizing the cost. In this post we will see how to accomplish this by using Selenium Webdriver.

Selenium Grid allows us to execute multiple instance of Webdriver or RC driver in parallel which uses same code base, and controls all the test cases running on virtual or distributed systems. Selenium Grids comprises of Hub and Nodes.

Hub: It can be considered as a server / a central point that will receive all test requests and will distribute to appropriate nodes / clients based on the configuration settings.

Nodes: Nodes are the client machines (either physical or virtual) connected to Hub which creates instances of Webdriver to execute the tests.


Implementation of Selenium Grid:

Download “selenium-server-standalone.jar”.

Configuring Hub

Start the Hub using following command:

java -jar selenium-server-standalone.jar -role hub


By default it will start automatically on port 4444. If port is unavailable the user can set by adding it to the command:

java -jar selenium-server-standalone.jar -port 4343 -role hub

Now, verify the hub has started by launching it on browser:

http://localhost:4444


Click on console link and then on view config link to see the configuration:


Configuring Nodes

Now place the “selenium-server-standalone.jar” on node machines and start node using following command:

java -jar selenium-server-standalone.jar -role node -hub http://localhost:4444/grid/register


After registering the node again view the configuration on Hub:


As you can see in the above image that node has been registered with the hub and Browser support and configuration detail is available to user.

Now all the configuration part has been completed so we can start writing our test cases and executing it on the registered nodes.

Script Creation

Create a project in any IDE you like. Find the sample code below:


After running the test script you can check session created for all the running nodes by launching the following:
http://localhost:5555/wd/hub


Stay tuned to see more updates.

Monday 18 August 2014

Installing TestNG Plugin for Eclipse

TestNG is a testing framework for the Java programming language inspired from JUnit and NUnit. The design goal of TestNG is to cover all categories of tests: unit, functional, end-to-end, integration, etc., with more powerful and easy-to-use functionalities.

Installing TestNG Plugin for Eclipse enable to run the test cases as TestNG Test directly from Eclipse.

Installing TestNG Plugin:

Go to Eclipse >> Eclipse Marketplace.

Enter the text "TestNG" in the Find field and press Enter.


Select the latest TestNG plugin listed and confirm the installation.


Wait for installation to complete. You may also click on OK button of a warning popup to continue.

Re-start the Eclipse. Now you are ready to use the TestNG.

Stay tuned to see more updates.

Facebook Page: https://www.facebook.com/crazzzygig

Configuring Maven With Eclipse

Apache Maven is a software project management and comprehension tool. Based on the concept of a project object model (POM), Maven can manage a project's build, reporting and documentation from a central piece of information.

Installing Maven in Eclipse is fairly simple. Follow the steps mentioned below:

Go to Eclipse >> Help >> Click Install New Software

Use this URL to get the latest stable build: http://download.eclipse.org/technology/m2e/releases/


Select Maven Integration for Eclipse and click Next.

Again Click Next to see installation details and Accept the License Agreement.


Now wait for the installation to complete:


If you get warning popup click OK to continue.

Now Re-start the Eclipse by clicking the 'Yes' button.


Now to check that Maven has successfully installed. Go to Eclipse Click:

File >> New >> Click Others.

Now expand the Maven folder and select Maven Project. Click Next and fill all the mandatory details to create a project. If you are able to create a maven project successfully, Maven has integrated successfully with Eclipse.

Stay tuned to see more updates. Please like/comment.

Suggestions are welcome.

Facebook Page: https://www.facebook.com/crazzzygig

Sunday 17 August 2014

Android Automation With Appium

In previous blogs we saw the process to setup Android Webdriver and Selendroid, which was used to automate Android Web Applications. The process to setup Appium is not much different, we require same set of tools except ‘Appium’ to start automating native, hybrid and mobile web applications.

Little introduction about Appium: Appium is an open source, cross platform test automation tool for mobile applications, hosted with GitHub. It supports Native, Hybrid and Mobile Web Applications. It is based on WebDriver JSON wire protocol.

Automation support for:
  1. iOS Mobile
  2. Android
  3. Firefox mobile OS
Test Modalities:
  1. Android
    1. Real Devices
    2. Emulators
    3. Native Browser
    4. Mobile Chrome
  2. iOS
    1. Real Devices
    2. Simulators
    3. Mobile Safari
Limitations:
  1. Android
  2. iOS
    • Need mac OSX 10.7+, lower versions not supported
Let’s start with the implementation, Following are the pre-requisites to start with:
  1. Java IDE (eg: Eclipse)
  2. Java Development Kit
  3. Maven Plugin for Eclipse (To create a maven project, you can create simple Java project)
  4. TestNG Plugin for Eclipse
  5. Android SDK
  6. Appium Server
Then, we need following configured:
  1. Environment Variables and Path Settings
    1. JAVA_HOME
    2. ANDROID_HOME
    3. MAVEN_HOME
  2. Android platform version 4.2+ must be installed.
Now, we will create a maven project.

Create a Maven project and open the pom.xml file. Add following artifacts to pom.xml and save the project:

image

Navigate to project >> Add a package >> Add a class:

In the below screen-shot as you can see I have created the instance of DesiredCapabilities and added some information to provide the Appium Server. We will see the relevance of each capability mentioned here.

image
  1. capabalities.setCapability("browserName", "") : It is used to tell the server which browser my script is going to use in case of mobile web automation, since we are automating here Native/Hybrid application so we will leave the value blank.
  2. capabalities.setCapability("deviceName", "emulator-5554") : It is used to tell the server on which device your script will run the automation. The value for device name can be achieved by running a command:     image
  3. capabalities.setCapability("platformVersion", "4.4") : It is used to tell the server which platform version is used.
  4. capabalities.setCapability("platformName", "Android") : It is used to tell the server which platform is used such as Android or iOS.
  5. capabalities.setCapability("appPackage", "com.SKSDroid.contactlistapp") : It is used to tell the package name for the application is being automated. To get the application package follow the steps:
    1. Create a folder named ‘app’ in the project created.
    2. Copy the application .apk file and paste in ‘app’ folder.
    3. Now navigate to : Windows >> Open Perspective >> Hierarchy View.
  6. capabalities.setCapability("appActivity", ".MainActivity") : It is used to tell the name of application activity on which will be the landing page for application when it will start.
  7. capabalities.setCapability("appWaitActivity", ".MainActivity") : It is used to tell the server to wait for the activity to appear before running the automation script.
As you can see in the below screen-shot of Hierarchy View, Device is listed with the opened application’s package name and active activity name which we have set in the capability. It will be updated as soon as you navigate to different activities.

image

Now finally it’s time to write test script. See the below code snippet in which we are just asserting a text of an element and clicking on it:

image

As you can see in the snippet we are using ID attribute to identify the element, so the question here is how to get the attributes of an element ? The answer is ‘UI Automator Viewer’. To start the UI Automator Viewer, go to tools directory of android sdk,open command prompt and write the command:

image

It will launch the UI Automator Viewer. Click on Device Screenshot button to generate the XML screenshot, and by hovering on the items you can see the attributes and values available for the element.

image

Once we are done with all above procedures, we will run the script. To run the script we first need to start the Appium Server. To start the Appium Server go to the downloaded folder ‘AppiumForWindows’ and double click on ‘Appium.exe’ to launch it. Click Start button to start the server on default ip address and port which is : 127.0.0.1:4723

image

Go to Eclipse and Run the script as ‘TestNG Test’. It will run the application on emulator and will perform the steps written in test script.

image

Please stay tuned to see more updates.

Facebook Page: https://www.facebook.com/crazzzygig

Friday 27 June 2014

Selendroid to Test Mobile Web Applications on Android Mobile Device

Selendroid is a test automation framework which drives off the Android native, hybrid and the mobile web applications. All the tests are written using the Selenium 2 client API.

In previous blog we saw that how to use Android Webdriver to automate the mobile web apps, since Android Webdriver has been deprecated and recommended to use Selendroid.

In this article we will see how to setup Selendroid and will also see example of mobile web application automation. Since Selendroid does not provide the facility to create the virtual devices, hence we will use the same instructions we followed in previous article (Mobile Automation With Android WebDriver).

Pre-Requisites:
Download Android SDK
Unzip it and place it somewhere in directory
Go to /android_sdk/eclipse folder
Launch Eclipse and Select a workspace location
Now navigate Windows >> Preferences >> Run/Debug >> String Substitution
Click New button to add a variable


Now open System Properties and add a variable ANDROID_SDK_HOME


Add a user variable ANDROID_HOME


Check if JAVA_HOME variable is not set then add it as well


Steps to Setup Emulator

      1. To list all the available targets run:


2. First create the Android Virtual Device (AVD)

3. Now start the emulator

And it will start the emulator:


Now download the selendroid-standalone (Selendroid-standalone) jar file.

Creation of automation script

1. Start the eclipse from /android_sdk/eclipse location.

2. Create a project and add selendroid-standalone.jar along with Selenium 2 client API.

see the code snippet for the example:


Now run the code as java application.

Output:


In next article we will see how to identify elements of mobile version web applications.

Please like the page if you like it.

Friday 16 May 2014

Mobile Automation With Android WebDriver

Setup Instructions to Android Webdriver

Pre-Requisites:
Download Android SDK
Unzip it and place it somewhere in directory
Go to /android_sdk folder/eclipse folder
Launch Eclipse and Select a workspace location
Now navigate Windows >> Preferences >> Run/Debug >> String Substitution
Click New button to add a variable


Now open System Properties and add a variable


Steps to Setup Emulator

To list all the available targets run command:
C:\>android list targets


First create the Android Virtual Device (AVD) using command:
C:\>android create avd -n my_android -t android-19 -c 100M


Now to start the emulator run command:
C:\>emulator -avd my_android &


And it will start the emulator:


Setting up Device

Either we can use Emulator as a virtual device or can connect the actual device through USB to your machine. We have already created an AVD named "my_android", so we will be using that one to setup and run our test case in this blog.

There are two options to run Android WebDriver Tests:
  • Using the remote WebDriver Server
  • Using the Android test Framework


In this blog, we will see how to run using the remote WebDriver Server:

Install the WebDriver APK

First download the WebDriver APK (Webdriver APK), and place it somewhere like in “platform-tools folder”

Every device and emulator has a serial id, to get the serial id run the following command:
C:\>adb devices


Now run the following command to install the downloaded WebDriver APK:
C:\>adb -s emulator-5554 -e install -r android-server.2.38.0.apk


When WebDriver APK is successfully installed start the Android WebDriver using the following command:
C:\>adb -s emulator-5554 shell am -a android.intent.action.MAIN -n org.openqa.selenium.android.app/.MainActivity


After running above command Android WebDriver will be ready to use and will look like:


Now we need to setup the port forwarding in order to forward traffic from host machine to on which Android WebDriver will run:
C:\>adb -s emulator-5554 forward tcp:8080 tcp:8080


Now your Emulator/Device is ready to run the automation scripts.

Creation of automation script

You can simply launch Eclipse and create a Java Project to create automation scripts. Create a Java project add Selenium-Java jar files into build path.

Take a look on a simple example of searching on Google.com:


Output:


This way to use Android WebDriver has been deprecated and recommended to use Selendroid instead, but it will give basic idea to work on Android Automation. Stay tuned to see next post on Selendroid.